The hindquarters of a deer, also known as hams, contain a large proportion of the total meat and some of the choicest cuts. It’s here where you’ll find the sirloin, round roasts, eye of round, and others. The more attention you can pay to your technique as you’re removing the back legs, the more meat will wind up in pretty little white packages in your freezer.
In this video, I’m showing how you’d remove the hindquarter from a deer that was taken out of the field whole, skinned, and gutted. That’s a luxury that we don’t always get. Most of the time when we kill an elk, moose, or mule deer, we’re taking the legs (often called quarters) off the carcass where it fell, along with all the other meat, too. Though this process in our office kitchen may look different than those situations, the principle is exactly the same. Study and familiarize yourself with the skeletal structure of the pelvis to do this better every time and then it won’t matter whether the carcass is upside down or on its side, or whether the guts are in or the hide is on.
I like to start this process by first cutting away the skirt—that thin flap of meat that extends back from the ribcage over the gut cavity. I cut it clear of the back ribs, short ribs, and hindquarter, then add to the stew meat pile.
With the deer’s carcass laying on its back, press down on both hind quarters to spread them wide. You may have already split the pelvis to remove the guts, but either way, you’ll want to slice downward along the side of the pelvis that’s attached to the ham you’re removing. It pays to be delicate about these cuts, using only the first inch or two of your knife blade. Cutting into bone will dull your edge quickly. Continue cutting downward until you hit and expose the ball joint where the femur connects to the pelvis.
Once you open up the sac encasing the ball joint, push the hindquarter down again until you can see the tendon running from end of the ball into the socket and cut it carefully. Continue cutting around the cup of the joint. If you feel too much resistance, don’t cut there.
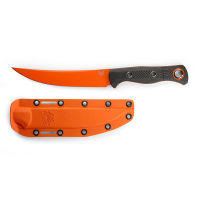
From this point, the pelvis curves inward, so if you keep cutting straight down you’re going to leave some meat behind. Angle your blade toward the spine to continue following the bone. You’ll have to trace around the bone that extends forward from the ball joint, the part you would call the iliac crest on a human, as well as a nub of bone off the back of the pelvis. A flexible knife blade sure comes in handy for these sometimes-counterintuitive cuts, allowing you to press the flat of the blade against the bone to carefully slice away as much meat as you can.
The final cuts will go down through the silverskin and fat that were on the top of the rump. The hindquarter will then fall away from the pelvis and body. Stay tuned for an upcoming video where we show how to break down this hindquarter into individual muscles for packaging and cooking.


