
Steady the crosshairs, control your breathing, and squeeze the trigger on the exhale. If this is the extent of your rifle shooting knowledge, this article is for you. You won’t become a world-class marksman by reading articles, but you’d be surprised how proficient you can become by expanding upon a few basic principles. By practicing these fundamentals, you’ll become proficient at 400 yards in no time.
Keep in mind that effective hunting range and target shooting capability are two different things. It takes a combination of proper bullet choice, adequate velocity, an accurate rifle, proper shooting fundamentals, and calm nerves to pull off a distant shot at game. Use these tips as building blocks to responsibly extend your maximum effective range.
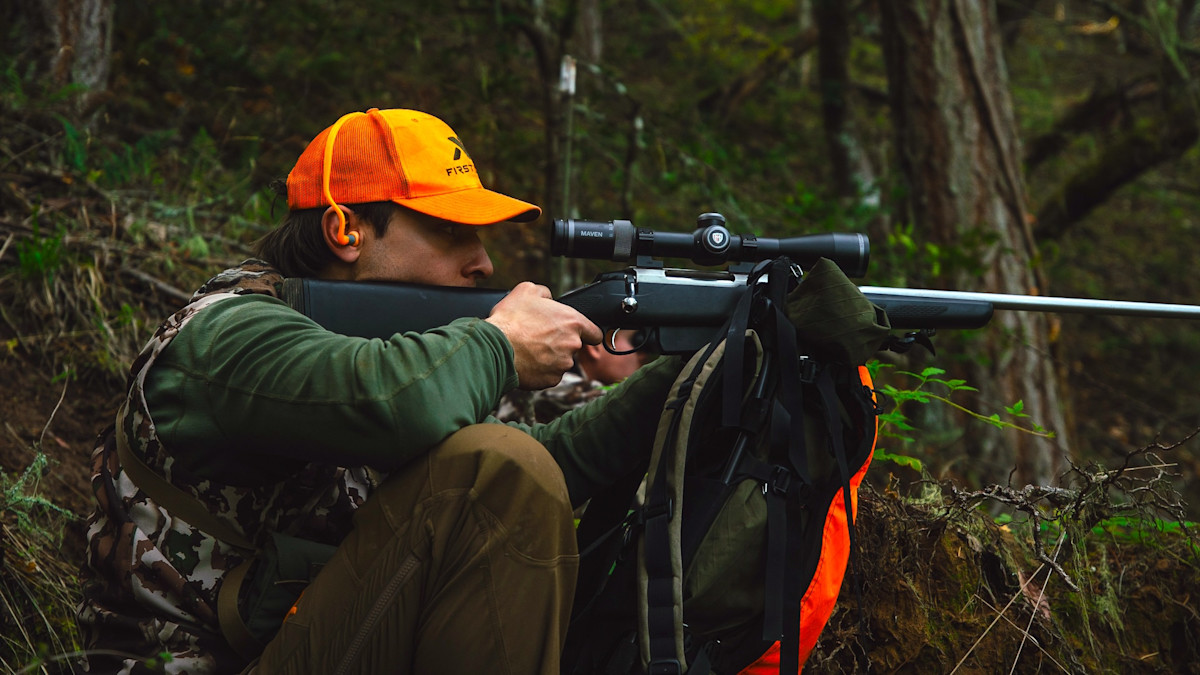
Rear Rifle Support
Most hunters are familiar with a bipod and the stability that bipods provide when shooting in the prone position. What some hunters don’t account for is stabilizing the butt end of the rifle. Using a bipod without supporting the buttstock of a rifle is like shooting a compound bow without a peep sight. Sure, you’ll be accurate enough, but you’re robbing yourself of a fair amount of accuracy.
From the prone or bench rest position, you can use just about anything to support the butt of your rifle. You can buy bags and vices made specifically for this purpose. In a hunting situation, however, many hunters don’t want to carry along ancillary gear that only serves one purpose. In that scenario, you can improvise and prop up the rear of your rifle with a closed fist, extra clothes, a backpack, or your binocular harness. From the seated and kneeling position, you’ll have to get more creative, like using trekking poles or your backpack to secure the rear end of your rifle. Practice with the gear you’ll hunt with to see what is comfortable and quickly replicable in a stressful environment.
Squaring up and Natural Point of Aim
Think of throwing a baseball or hitting a 7-iron. The first thing you do is square up your body for the shot or throw. Every golfer can relate to yanking a shot, only to find out that they lined up off-center to begin with. Shooting a rifle is no different. If your body is parallel to the direction of the rifle, the recoil will travel perfectly rearward and deliver a bullet with accuracy. Alternatively, if your body is cocked off to the left or right of the rifle, the recoil energy is going to kick the rifle left or right, throwing the shot off in that direction. The goal is to position your body to absorb the recoil in line with the bullet’s flight path.
In order to true-up your shooting position, you’ll want to check your natural point of aim. That’s a fancy way of saying, where do your crosshairs land without you manipulating and exerting force on the rifle? An easy check is to square up behind the rifle, with the crosshairs on the target. Relax your grip on the rifle and close your eyes for a few seconds. After a breath or two, open your eyes. Are the crosshairs still on target? Adjust your body left and right until the eyes-closed test results in crosshairs that don’t leave the bullseye. This is how you hone in your natural point of aim.
Study Your Wobble Zone
Your wobble zone, or pin float in the archery realm, is the size of the area in which your crosshair bounces around when aiming for the bullseye. If you were to trace a line with your crosshairs while it bounces around the bullseye, the diameter of that traced line would be your wobble zone. Call it voodoo or Murphy’s Law, but when shooting a bow or rifle, the projectile seemingly always impacts at the furthest point of your wobble zone. One would think that you’d get lucky every once in a while, and the bullet would impact the center of your wobble zone, however, it doesn’t seem to work out that way very often.
Essentially, your wobble zone represents your margin of error, assuming perfect shot execution. If your reticle is bouncing around, on and off the deer, you’re likely going to miss and shouldn’t take the shot. Improve your shooting position until the wobble zone is constantly well within the vitals.
Dry Fire Practice
For the bowhunters in the room, dry fire practice is the archery equivalent to blank-bale shooting. The goal is to practice your shot routine, from building a shooting position to pressing the trigger and everything in between, to develop muscle memory. You want your shot sequence to be routine and second nature. It also helps reduce recoil anxiety because you go through all the same steps as shooting a live round without the consequences of recoil. When on a hunt, simulating a shot opportunity and incorporating dry fire practice is a good way to kill some downtime.
Practice Different Shooting Positions
You’re not always going to find a perfect shooting position with ample time to prepare for the shot. For example, if hunting sage country or flat land terrain, it’s going to be tough shooting prone because of the vegetation. Similarly, shooting prone on the downhill slope of a mountain can prove difficult.
Learning and actually practicing shooting from a seated, kneeling, or standing position is paramount. Whether using shooting sticks, tripods, trekking poles, resting the rifle on a pack, or against a tree, the principles are the same. Practicing these various shooting positions will reveal how far your maximum effective range really is and where you can improve as a marksman.
Shop
Sign In or Create a Free Account
Related

Firearms
Shooting Positions for Rifle Hunters


Firearms
Why Your Hunting Rifle Sucks

